渲染文本和公式
您可以通过两种不同的方式在视频中渲染文本
使用Pango(
text_mobject)使用LaTeX(
tex_mobject)
如果您想渲染简单文本,应该使用Text或MarkupText,或其派生类,如Paragraph。更多信息请参见不使用LaTeX的文本。
需要进行数学排版时应使用LaTeX。更多信息请参见使用LaTeX的文本。
不使用LaTeX的文本
将文本添加到动画中最简单的方法是使用Text类。它使用Pango库来渲染文本。通过Pango,您还可以渲染非英文字符,如你好、こんにちは、안녕하세요或مرحبا بالعالم。
这是一个简单的Hello World动画。
示例:HelloWorld 

from manim import *

class HelloWorld(Scene):
    def construct(self):
        text = Text("Hello world", font_size=144)
        self.add(text)
class HelloWorld(Scene):
    def construct(self):
        text = Text("Hello world", font_size=144)
        self.add(text)
参考:Text
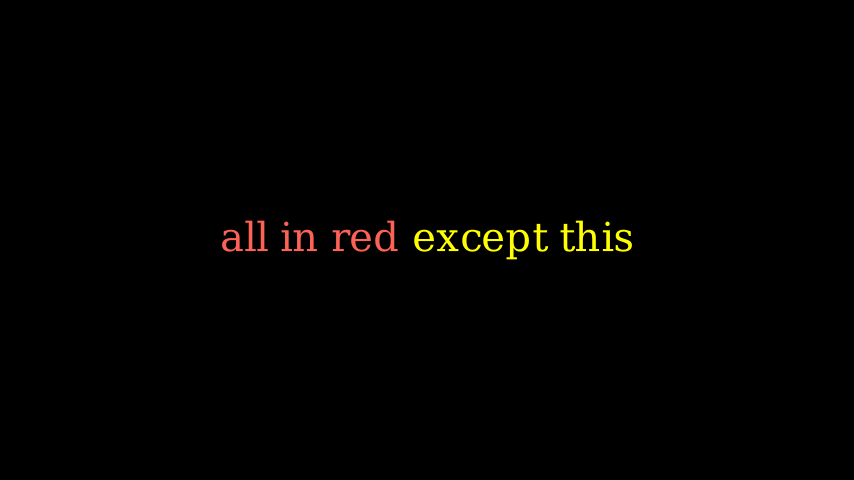
您也可以使用MarkupText,它允许使用PangoMarkup(详情请参阅MarkupText的文档)来渲染文本。例如:
示例:SingleLineColor 
from manim import *

class SingleLineColor(Scene):
    def construct(self):
        text = MarkupText(
            f'all in red <span fgcolor="{YELLOW}">except this</span>', color=RED
        )
        self.add(text)
class SingleLineColor(Scene):
    def construct(self):
        text = MarkupText(
            f'all in red except this', color=RED
        )
        self.add(text)
参考:MarkupText
使用Text
本节解释了Text的属性以及如何在动画中使用它。
使用字体
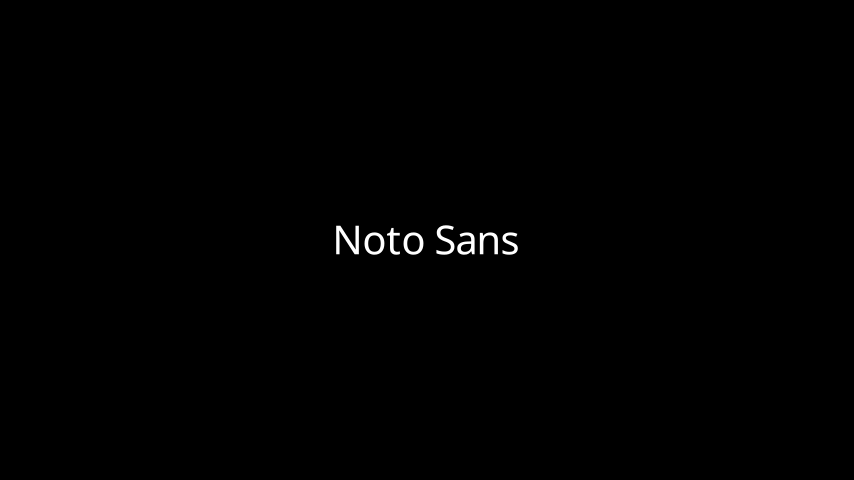
您可以使用font设置不同的字体。
注意
所使用的字体必须安装在您的系统中,并且Pango应该知道它。您可以使用manimpango.list_fonts()获取字体列表。
>>> import manimpango
>>> manimpango.list_fonts()
[...]
示例:FontsExample 
from manim import *

class FontsExample(Scene):
    def construct(self):
        ft = Text("Noto Sans", font="Noto Sans")
        self.add(ft)
class FontsExample(Scene):
    def construct(self):
        ft = Text("Noto Sans", font="Noto Sans")
        self.add(ft)
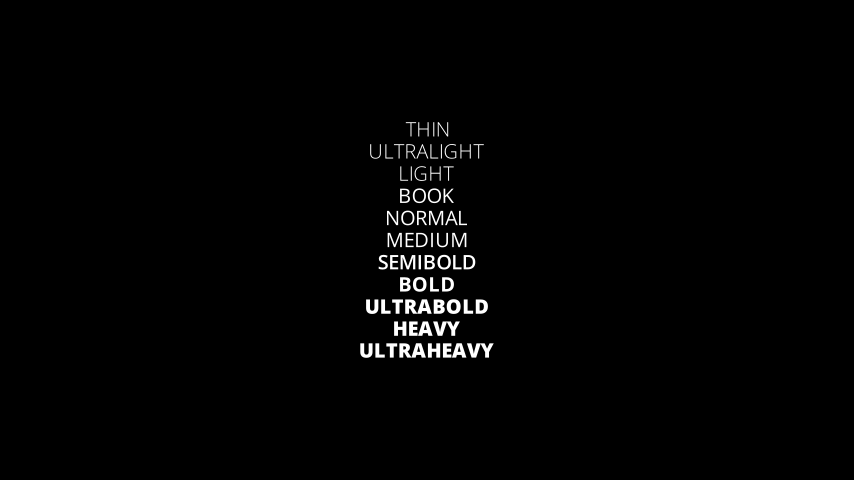
设置倾斜和粗细
Slant(倾斜)是文本的样式,可以是NORMAL(默认)、ITALIC(斜体)或OBLIQUE(倾斜)。通常,对于许多字体,ITALIC和OBLIQUE看起来相似,但ITALIC使用罗马样式,而OBLIQUE使用斜体样式。
Weight(粗细)指定字体的粗细程度。您可以在manimpango.Weight中查看粗细列表。
示例:SlantsExample 

from manim import *

class SlantsExample(Scene):
    def construct(self):
        a = Text("Italic", slant=ITALIC)
        self.add(a)
class SlantsExample(Scene):
    def construct(self):
        a = Text("Italic", slant=ITALIC)
        self.add(a)
示例:DifferentWeight 
from manim import *

class DifferentWeight(Scene):
    def construct(self):
        import manimpango

        g = VGroup()
        weight_list = dict(
            sorted(
                {
                    weight: manimpango.Weight(weight).value
                    for weight in manimpango.Weight
                }.items(),
                key=lambda x: x[1],
            )
        )
        for weight in weight_list:
            g += Text(weight.name, weight=weight.name, font="Open Sans")
        self.add(g.arrange(DOWN).scale(0.5))
使用颜色
您可以使用color设置文本颜色
示例:SimpleColor 

from manim import *

class SimpleColor(Scene):
    def construct(self):
        col = Text("RED COLOR", color=RED)
        self.add(col)
class SimpleColor(Scene):
    def construct(self):
        col = Text("RED COLOR", color=RED)
        self.add(col)
您可以使用t2c等实用工具为特定字符着色。如果您的文本包含连字,这可能会导致问题,详见遍历文本。
t2c接受两种类型的字典:
键可以包含索引,如
[2:-1]或[4:8],这类似于Python中的切片操作。值应为Color中的文本颜色。键包含应单独着色的单词或字符,值应为
Color中的颜色
示例:Textt2cExample 

from manim import *

class Textt2cExample(Scene):
    def construct(self):
        t2cindices = Text('Hello', t2c={'[1:-1]': BLUE}).move_to(LEFT)
        t2cwords = Text('World',t2c={'rl':RED}).next_to(t2cindices, RIGHT)
        self.add(t2cindices, t2cwords)
class Textt2cExample(Scene):
    def construct(self):
        t2cindices = Text('Hello', t2c={'[1:-1]': BLUE}).move_to(LEFT)
        t2cwords = Text('World',t2c={'rl':RED}).next_to(t2cindices, RIGHT)
        self.add(t2cindices, t2cwords)
如果您想避免使用颜色时(由于连字)出现问题,请考虑使用MarkupText。
使用渐变
您可以使用gradient添加渐变。该值必须是任何长度的可迭代对象。
示例:GradientExample 

from manim import *

class GradientExample(Scene):
    def construct(self):
        t = Text("Hello", gradient=(RED, BLUE, GREEN), font_size=96)
        self.add(t)
class GradientExample(Scene):
    def construct(self):
        t = Text("Hello", gradient=(RED, BLUE, GREEN), font_size=96)
        self.add(t)
您还可以使用t2g对文本的特定字符应用渐变。它与颜色接口具有相似的语法
示例:t2gExample 

from manim import *

class t2gExample(Scene):
    def construct(self):
        t2gindices = Text(
            'Hello',
            t2g={
                '[1:-1]': (RED,GREEN),
            },
        ).move_to(LEFT)
        t2gwords = Text(
            'World',
            t2g={
                'World':(RED,BLUE),
            },
        ).next_to(t2gindices, RIGHT)
        self.add(t2gindices, t2gwords)
设置行间距
您可以使用line_spacing设置行间距
示例:LineSpacing 

from manim import *

class LineSpacing(Scene):
    def construct(self):
        a = Text("Hello\nWorld", line_spacing=1)
        b = Text("Hello\nWorld", line_spacing=4)
        self.add(Group(a,b).arrange(LEFT, buff=5))
class LineSpacing(Scene):
    def construct(self):
        a = Text("Hello\nWorld", line_spacing=1)
        b = Text("Hello\nWorld", line_spacing=4)
        self.add(Group(a,b).arrange(LEFT, buff=5))
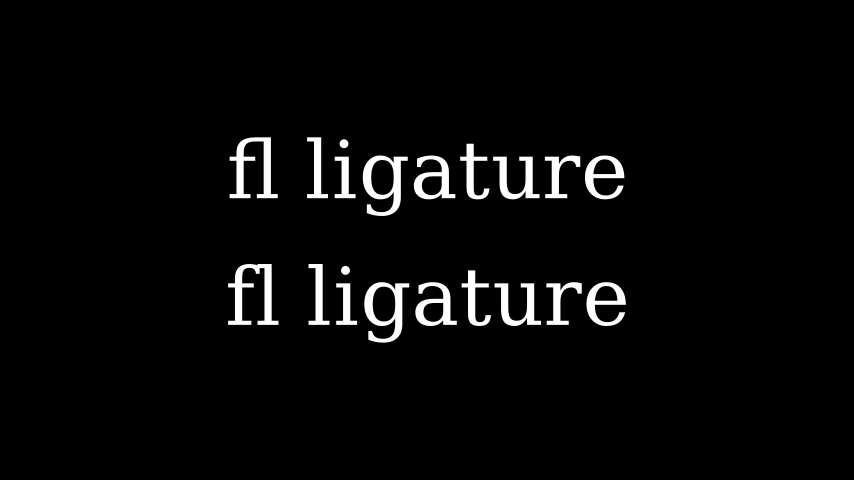
禁用连字
通过禁用连字,您将获得字符和子对象之间的一一对应关系。这解决了文本着色问题。
警告
请注意,对严重依赖连字的文本(如阿拉伯文本)使用此方法可能会产生意外结果。
您可以通过将disable_ligatures传递给Text来禁用连字。例如:
示例:DisableLigature 
from manim import *

class DisableLigature(Scene):
    def construct(self):
        li = Text("fl ligature",font_size=96)
        nli = Text("fl ligature", disable_ligatures=True, font_size=96)
        self.add(Group(li, nli).arrange(DOWN, buff=.8))
class DisableLigature(Scene):
    def construct(self):
        li = Text("fl ligature",font_size=96)
        nli = Text("fl ligature", disable_ligatures=True, font_size=96)
        self.add(Group(li, nli).arrange(DOWN, buff=.8))
遍历Text
Text对象表现得像VGroups。因此,您可以对文本进行切片和索引。
例如,您可以通过迭代来设置每个字母的不同颜色。
示例:IterateColor 

from manim import *

class IterateColor(Scene):
    def construct(self):
        text = Text("Colors", font_size=96)
        for letter in text:
            letter.set_color(random_bright_color())
        self.add(text)
class IterateColor(Scene):
    def construct(self):
        text = Text("Colors", font_size=96)
        for letter in text:
            letter.set_color(random_bright_color())
        self.add(text)
使用MarkupText
MarkupText与Text相似,它们之间唯一的区别是它接受并处理PangoMarkup(类似于html),而不是仅仅渲染纯文本。
有关PangoMarkup的更多详细信息和进一步参考,请查阅MarkupText的文档。
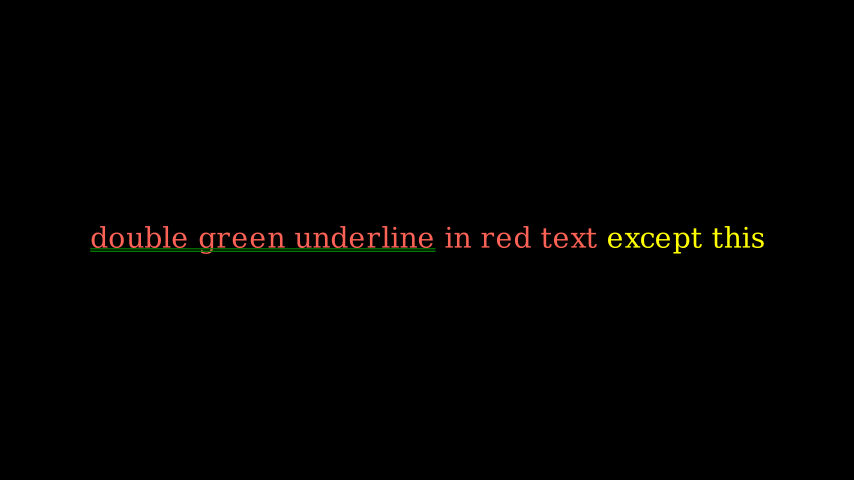
示例:MarkupTest 
from manim import *

class MarkupTest(Scene):
    def construct(self):
        text = MarkupText(
            f'<span underline="double" underline_color="green">double green underline</span> in red text<span fgcolor="{YELLOW}"> except this</span>',
            color=RED,
            font_size=34
        )
        self.add(text)
class MarkupTest(Scene):
    def construct(self):
        text = MarkupText(
            f'double green underline in red text except this',
            color=RED,
            font_size=34
        )
        self.add(text)
使用LaTeX的文本
就像您可以使用Text向视频添加文本一样,您可以使用Tex插入LaTeX。
例如,
示例:HelloLaTeX 

from manim import *

class HelloLaTeX(Scene):
    def construct(self):
        tex = Tex(r"\LaTeX", font_size=144)
        self.add(tex)
class HelloLaTeX(Scene):
    def construct(self):
        tex = Tex(r"\LaTeX", font_size=144)
        self.add(tex)
注意
请注意,我们使用的是原始字符串 (r'...') 而不是常规字符串 ('...')。这是因为TeX代码使用了许多特殊字符——例如\——这些字符在常规 Python 字符串中具有特殊含义。另一种方法是写\\来转义反斜杠:Tex('\\LaTeX')。
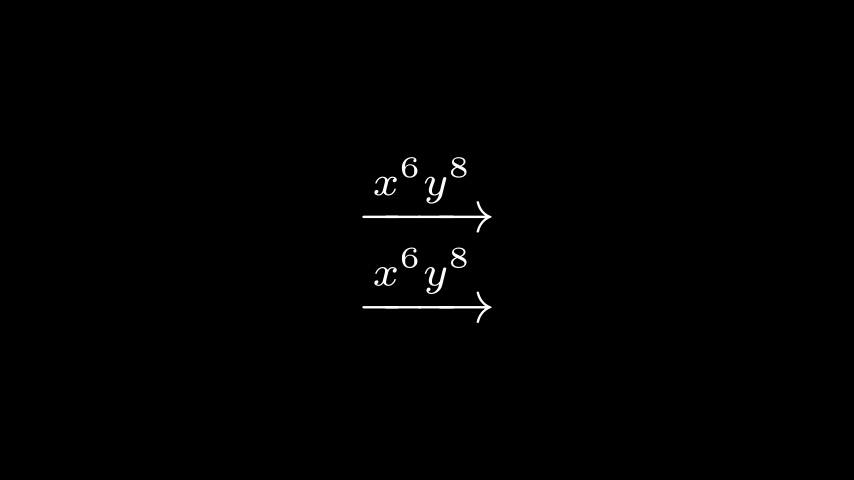
使用MathTex
传递给MathTex的所有内容默认都在数学模式下。更准确地说,MathTex在align*环境中处理。您可以通过用$符号将公式括起来,在使用Tex时达到类似的效果:$\xrightarrow{x^6y^8}$
示例:MathTeXDemo 
from manim import *

class MathTeXDemo(Scene):
    def construct(self):
        rtarrow0 = MathTex(r"\xrightarrow{x^6y^8}", font_size=96)
        rtarrow1 = Tex(r"$\xrightarrow{x^6y^8}$", font_size=96)

        self.add(VGroup(rtarrow0, rtarrow1).arrange(DOWN))
class MathTeXDemo(Scene):
    def construct(self):
        rtarrow0 = MathTex(r"\xrightarrow{x^6y^8}", font_size=96)
        rtarrow1 = Tex(r"$\xrightarrow{x^6y^8}$", font_size=96)

        self.add(VGroup(rtarrow0, rtarrow1).arrange(DOWN))
LaTeX 命令和关键字参数
我们可以使用AMS数学包中的任何标准LaTeX命令。例如mathtt数学文本类型或looparrowright箭头。
示例:AMSLaTeX 

from manim import *

class AMSLaTeX(Scene):
    def construct(self):
        tex = Tex(r'$\mathtt{H} \looparrowright$ \LaTeX', font_size=144)
        self.add(tex)
class AMSLaTeX(Scene):
    def construct(self):
        tex = Tex(r'$\mathtt{H} \looparrowright$ \LaTeX', font_size=144)
        self.add(tex)
在Manim方面,Tex类也接受属性来改变输出的外观。这与Text类非常相似。例如,color关键字改变TeX对象的颜色。
示例:LaTeXAttributes 

from manim import *

class LaTeXAttributes(Scene):
    def construct(self):
        tex = Tex(r'Hello \LaTeX', color=BLUE, font_size=144)
        self.add(tex)
class LaTeXAttributes(Scene):
    def construct(self):
        tex = Tex(r'Hello \LaTeX', color=BLUE, font_size=144)
        self.add(tex)
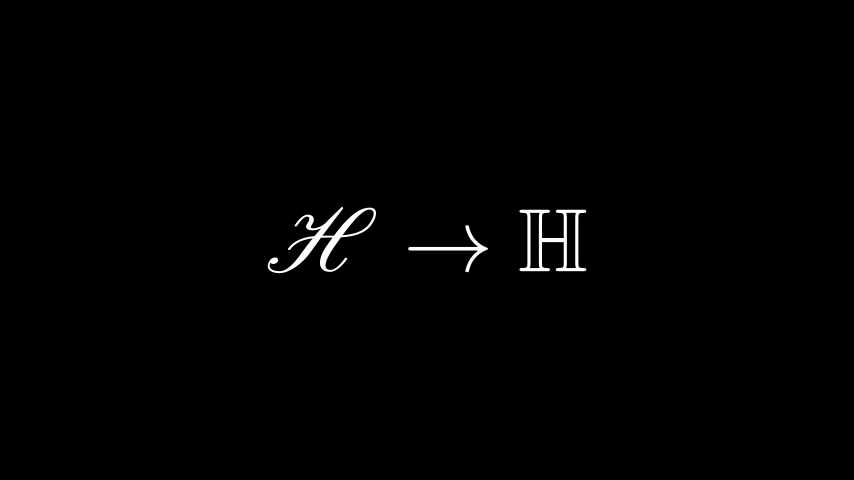
额外的LaTeX包
某些命令需要将特殊包加载到TeX模板中。例如,要使用mathscr脚本,我们需要添加mathrsfs包。由于此包默认未加载到Manim的tex模板中,我们必须手动添加它。
示例:AddPackageLatex 
from manim import *

class AddPackageLatex(Scene):
    def construct(self):
        myTemplate = TexTemplate()
        myTemplate.add_to_preamble(r"\usepackage{mathrsfs}")
        tex = Tex(
            r"$\mathscr{H} \rightarrow \mathbb{H}$",
            tex_template=myTemplate,
            font_size=144,
        )
        self.add(tex)
子字符串和部分
TeX对象可以接受多个字符串作为参数。之后,您可以通过索引(如tex[1])或选择tex代码的一部分来引用各个部分。在此示例中,我们使用set_color_by_tex()设置\bigstar的颜色
示例:LaTeXSubstrings 

from manim import *

class LaTeXSubstrings(Scene):
    def construct(self):
        tex = Tex('Hello', r'$\bigstar$', r'\LaTeX', font_size=144)
        tex.set_color_by_tex('igsta', RED)
        self.add(tex)
class LaTeXSubstrings(Scene):
    def construct(self):
        tex = Tex('Hello', r'$\bigstar$', r'\LaTeX', font_size=144)
        tex.set_color_by_tex('igsta', RED)
        self.add(tex)
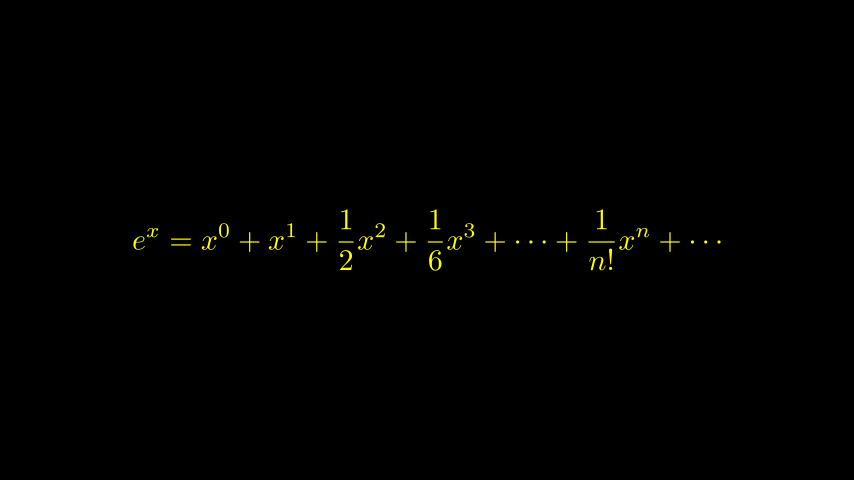
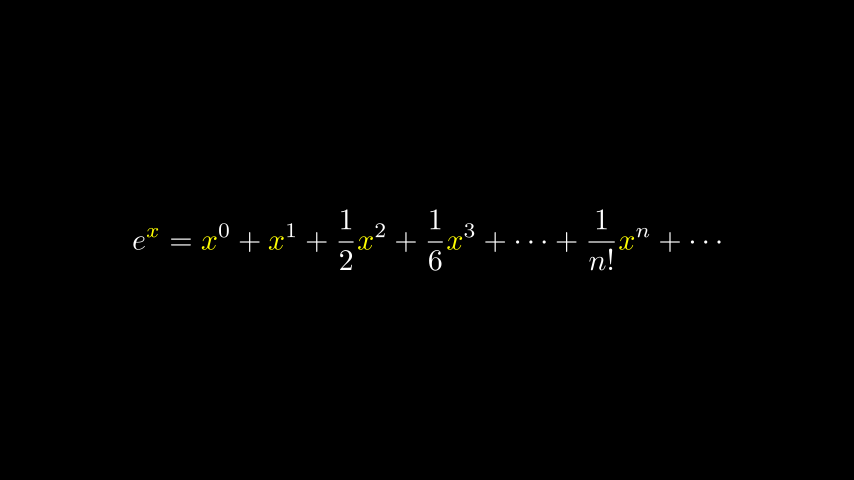
请注意,set_color_by_tex() 会对包含 Tex 的整个子字符串着色,而不仅仅是特定的符号或 Tex 表达式。请看以下示例:
示例:IncorrectLaTeXSubstringColoring 
from manim import *

class IncorrectLaTeXSubstringColoring(Scene):
    def construct(self):
        equation = MathTex(
            r"e^x = x^0 + x^1 + \frac{1}{2} x^2 + \frac{1}{6} x^3 + \cdots + \frac{1}{n!} x^n + \cdots"
        )
        equation.set_color_by_tex("x", YELLOW)
        self.add(equation)
class IncorrectLaTeXSubstringColoring(Scene):
    def construct(self):
        equation = MathTex(
            r"e^x = x^0 + x^1 + \frac{1}{2} x^2 + \frac{1}{6} x^3 + \cdots + \frac{1}{n!} x^n + \cdots"
        )
        equation.set_color_by_tex("x", YELLOW)
        self.add(equation)
如您所见,这会将整个方程式染成黄色,这与预期可能不符。要仅将x染成黄色,我们必须执行以下操作:
示例:CorrectLaTeXSubstringColoring 
from manim import *

class CorrectLaTeXSubstringColoring(Scene):
    def construct(self):
        equation = MathTex(
            r"e^x = x^0 + x^1 + \frac{1}{2} x^2 + \frac{1}{6} x^3 + \cdots + \frac{1}{n!} x^n + \cdots",
            substrings_to_isolate="x"
        )
        equation.set_color_by_tex("x", YELLOW)
        self.add(equation)
通过将substrings_to_isolate设置为x,我们自动将MathTex拆分为子字符串,并将x组件分离到单独的子字符串中。只有这样,才能使用set_color_by_tex()实现所需的结果。
请注意,Manim 还支持一种自定义语法,可以轻松地将 TeX 字符串拆分为子字符串:只需用双大括号将要隔离的公式部分括起来即可。在字符串MathTex(r"{{ a^2 }} + {{ b^2 }} = {{ c^2 }}")中,渲染的 mobject 将由子字符串a^2、+、b^2、=和c^2组成。这使得使用TransformMatchingTex轻松编写类似文本片段之间的转换。
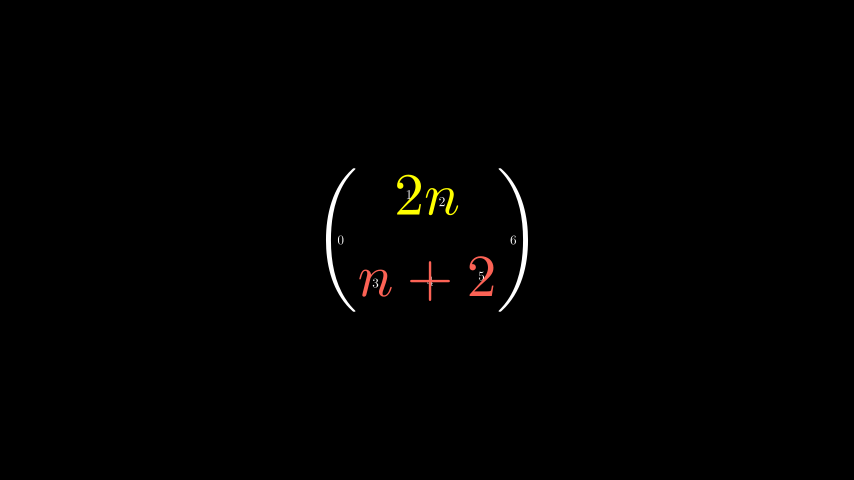
使用index_labels处理复杂字符串
您有时可能会处理一个非常复杂的MathTex对象,这使得处理其单个组件变得困难。这时调试函数index_labels()就非常有用了。
此方法显示了mobject子对象的索引,让您可以轻松找到要更改的mobject组件。
示例:IndexLabelsMathTex 
from manim import *

class IndexLabelsMathTex(Scene):
    def construct(self):
        text = MathTex(r"\binom{2n}{n+2}", font_size=96)

        # index the first (and only) term of the MathTex mob
        self.add(index_labels(text[0]))

        text[0][1:3].set_color(YELLOW)
        text[0][3:6].set_color(RED)
        self.add(text)
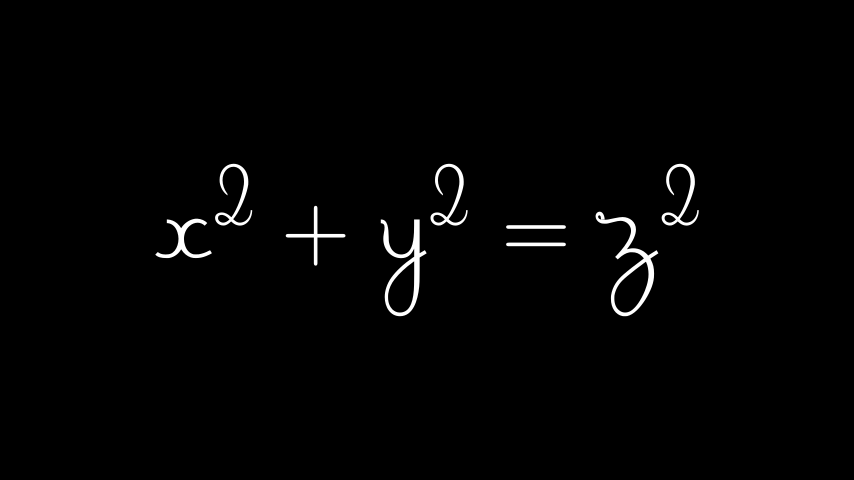
LaTeX 数学字体 - 模板库
在LaTeX中排版数学公式时更改字体比常规文本更复杂。它需要更改用于编译TeX的模板。Manim提供了TexFontTemplates集合供您使用。这些模板都可以在数学模式下工作
示例:LaTeXMathFonts 
from manim import *

class LaTeXMathFonts(Scene):
    def construct(self):
        tex = Tex(
            r"$x^2 + y^2 = z^2$",
            tex_template=TexFontTemplates.french_cursive,
            font_size=144,
        )
        self.add(tex)
class LaTeXMathFonts(Scene):
    def construct(self):
        tex = Tex(
            r"$x^2 + y^2 = z^2$",
            tex_template=TexFontTemplates.french_cursive,
            font_size=144,
        )
        self.add(tex)
Manim 还包含一个TexTemplateLibrary,其中包含 3Blue1Brown 使用的 TeX 模板。其中一个例子是 ctex 模板,用于排版中文脚本。要使其正常工作,您的系统必须安装 ctex LaTeX 包。此外,如果您只是排版文本,您可能根本不需要Tex,而应该使用Text。
示例:LaTeXTemplateLibrary 

from manim import *

class LaTeXTemplateLibrary(Scene):
    def construct(self):
        tex = Tex('Hello 你好 \\LaTeX', tex_template=TexTemplateLibrary.ctex, font_size=144)
        self.add(tex)
class LaTeXTemplateLibrary(Scene):
    def construct(self):
        tex = Tex('Hello 你好 \\LaTeX', tex_template=TexTemplateLibrary.ctex, font_size=144)
        self.add(tex)
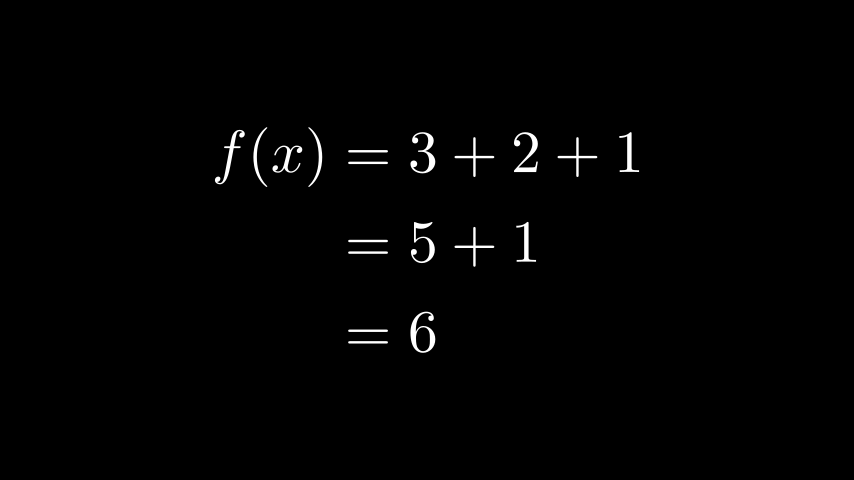
对齐公式
MathTex对象在LaTeX的align*环境中排版。这意味着在排版多行公式时可以使用&对齐字符
示例:LaTeXAlignEnvironment 
from manim import *

class LaTeXAlignEnvironment(Scene):
    def construct(self):
        tex = MathTex(r'f(x) &= 3 + 2 + 1\\ &= 5 + 1 \\ &= 6', font_size=96)
        self.add(tex)
class LaTeXAlignEnvironment(Scene):
    def construct(self):
        tex = MathTex(r'f(x) &= 3 + 2 + 1\\ &= 5 + 1 \\ &= 6', font_size=96)
        self.add(tex)